


Document Actions
gvSIG-Desktop 1.1. Manual de usuario.
Select the “New SHP” option opens the wizard which will help you create the new layer.
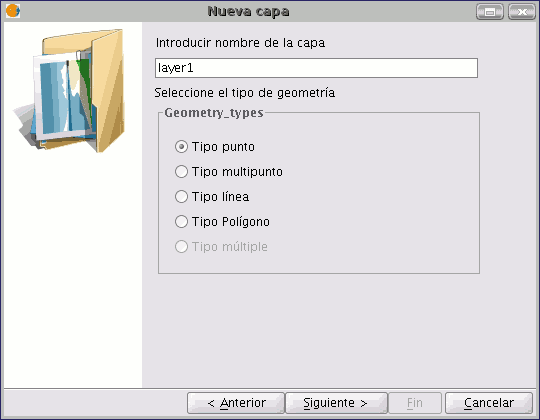
The first window of the wizard allows you to choose the name you wish the new .shp file to appear with in the ToC, in addition to the geometry type associated with it.
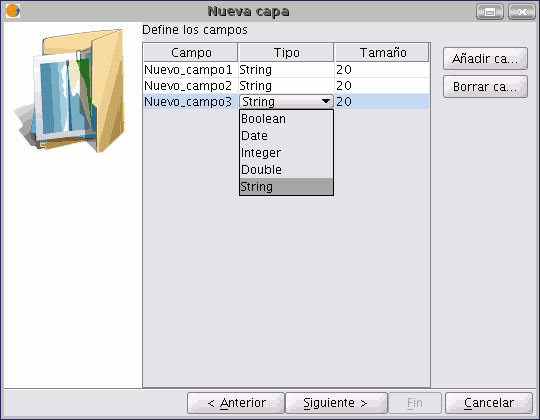
The second window of the wizard allows you to add all the fields you wish to the attribute table associated with the layer and to define some of the properties of these fields.
To add fields to the table, click on “Add field”. One field is added every time you click on this button.
If you wish to delete any of the fields created, simply select the field and click on the “Delete Field” button. You can edit the rest of the properties from the attribute table in which the fields are defined.
Field name: Place the cursor over the field name (“New field” by default) and write the new name. The maximum number of characters allowed for the field name is 10.
- Field type: Place the cursor over any of the files in the “Type” field. A pull-down menu appears in which the type of field you wish to create can be selected.
- BOOLEAN: Boolean type data admits “true” or “false” values.
- DATE: This allows you to create a field which includes dates. The maximum number of characters allowed is 8.
- INTEGER and DOUBLE are two number type fields. The former is for whole numbers and the latter for decimal values.
- STRING: This is an alphanumeric field type. The maximum number of characters allowed is 254.
Field length: This allows you to set the maximum number of characters for the field created (at present, this only applies to String-type fields).
Once the structure of the table associated with the shape file has been determined, click on “Next”.
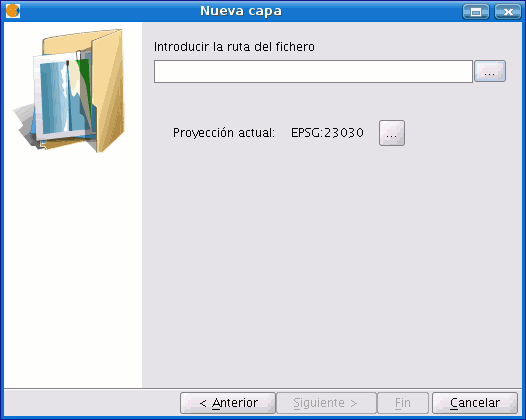
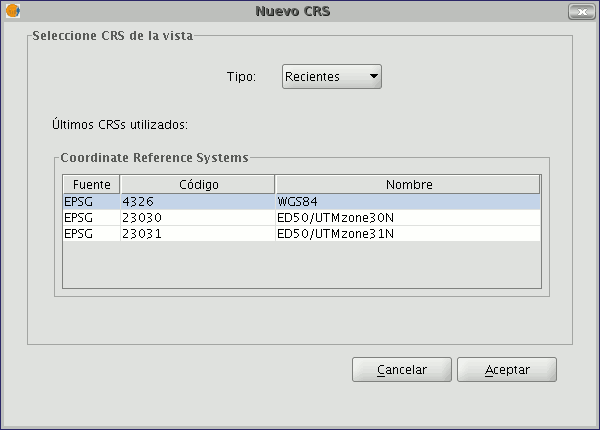
You can save the file in the new window and choose the Reference System for the view the new layer is going to be inserted into by clicking on the button to the right of “Current Projection”.
If other layers have been inserted in the view, this button will be disabled since the view already has a selected reference system.
To save the new layer, indicate the file path to save the file in the text box.
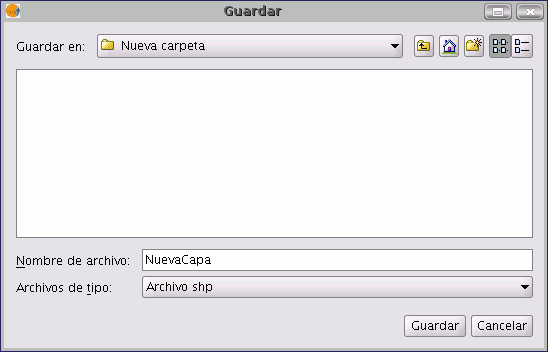
You can also open the search dialogue box to select the file path the new shape file will be saved in. To do so, click on the button to the right of the text box. Write the name for the new layer (remember that this name will appear in the source file of the shape file and that it may be different to the name which appears in the ToC) and click on the “Save” button.

When you have finished creating a new SHP file, it will be added to the ToC.
In addition, the editing tools will be activated to allow you to create the elements of the new layer.


